I know it's been forever since I posted. So sorry for being out of the loop for so long. I think I got burned out from working on my parent's 50th anniversary stuff. I'm thrilled with how all their stuff turned out but I'm kicking myself because I didn't take pictures of everything! *GASP* I know! What was I thinking??? That's the problem, I wasn't. LOL. So my Mom has promised me to bring the 3 albums that I made for them with her to my house next week and I'll be able to take pictures and share with you what I spent all my crafty time on. : ) I did remember to take pictures of the treat tins we had sitting at every place setting. My sister-in-law and I worked on these together. I got the idea from the
DCWV blog.
Here's some pics:
All the flowers on the top are magnets. We added different centers to each of the paper flowers and inked all the edges then added magnets. We cut out the shaped tops from Elegant Edges, inked them and stamped them with a few different sayings. Then we modge-podged them to the tin. (Ok, my sister-in-law did and she still loves me even after all that!)
Here's the insides:
We had mints in the bottom. The inside top of the tin was also 3 magnets that we made.
The round ones are wood circles that we glued different papers to the top of and stamped different images on. We inked the edges of the wood circles and it looked so cool! Sorry I didn't get a good picture of it. The other shaped magnets were shapes I cut out using the Cricut. We inked, doodled on and added magnets to finish those off. We made a total of 72 tins. So that was a LOT of magnets.
(This is my 3 year old helping me fill the tins)
This is the tin I made to hold the cards they received at the party.
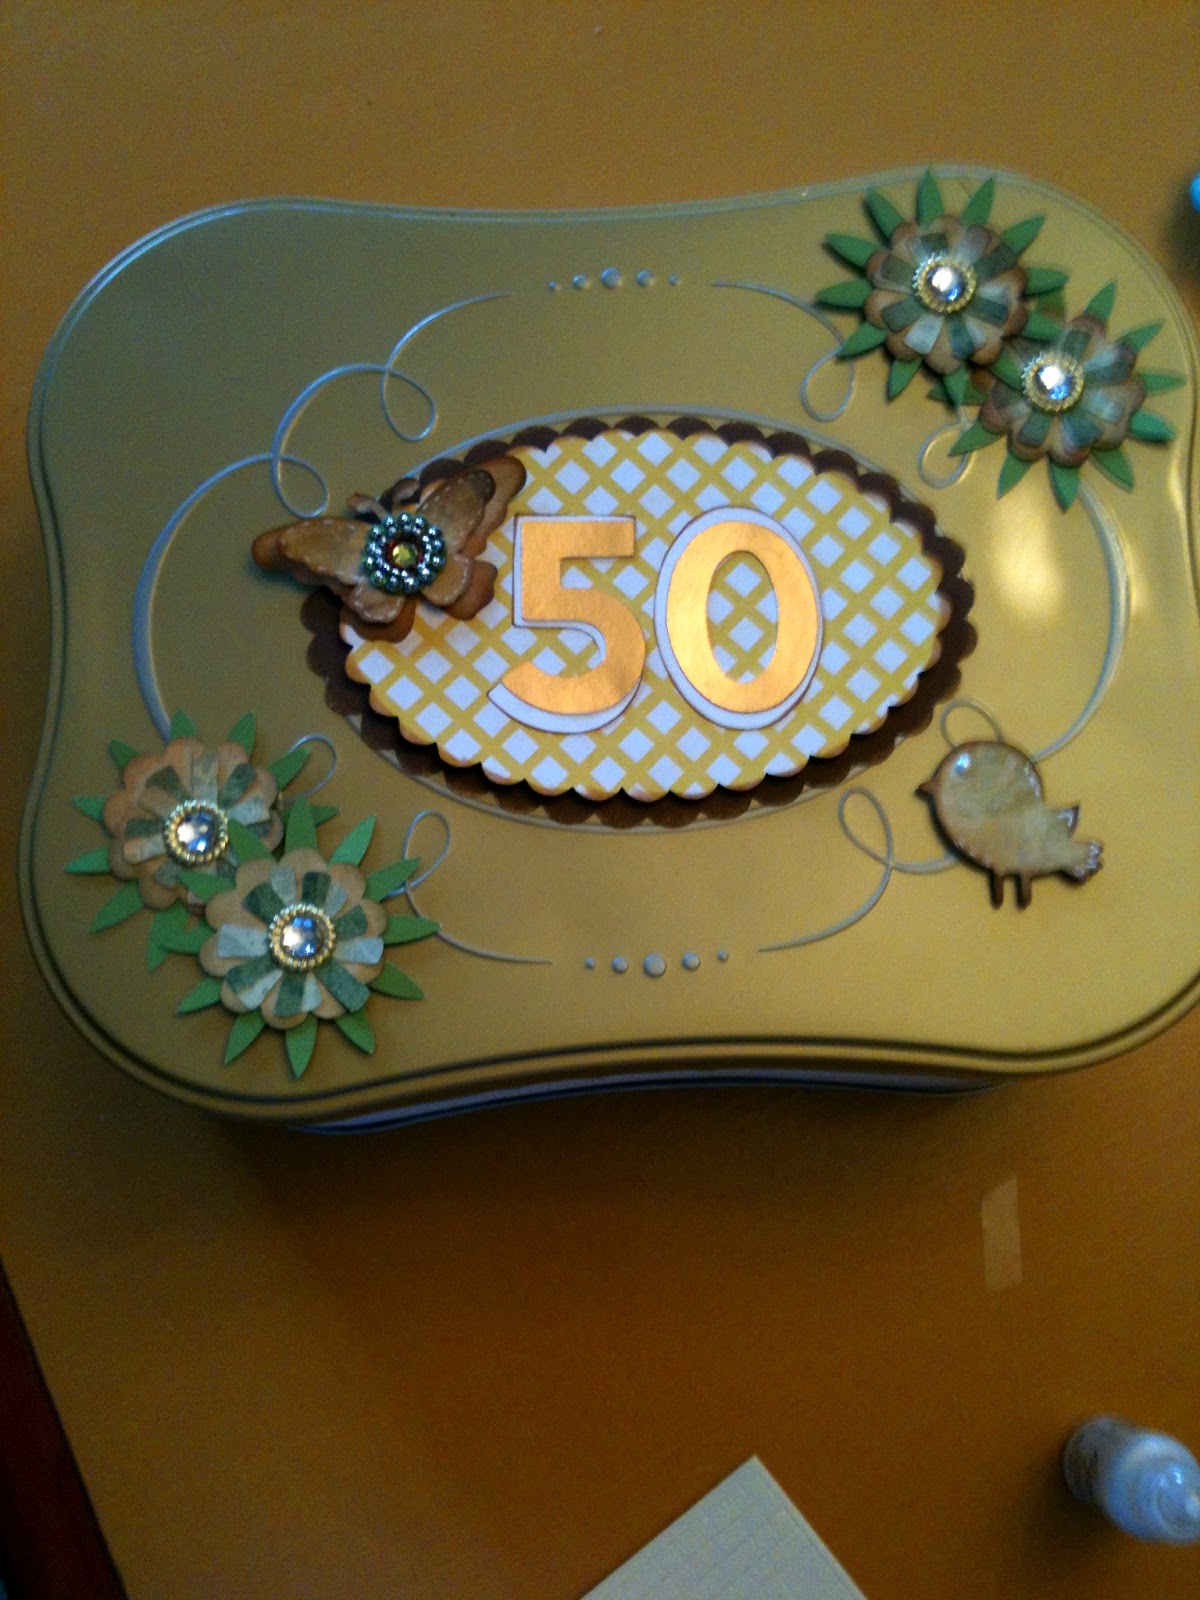
Sorry for the bad picture. This was with my cell phone to show my sister what it was looking like.
It's not the finished product but it's really close. This was an old cookie tin that I decorated with cuts from my Cricut Cartridges. Sorry I can't remember which cartridges I used. The only one I know for sure is Elegant Edges for the scalloped ovals.
I'll post more pictures of my parent's scrapbook albums once I get them.
In the mean time, my next big project is for my sister. She's turning 50 in August and I'm making her an album. I'll try and be better about taking pictures to share. : )
Thanks for sticking with me. I hope to be back to a regular schedule again.
Big hugs!
Chris