Saturday, June 23, 2012

Another Layout for my sister

Here's another layout for my sister's scrapbook. This will actually be the first page in the book. (I rarely do anything in order... lol.)   I used all Webster's Pages In Love Collection again.  Only the pearls and gems are from my stash. The rest is all Webster's Pages.

(I didn't think I should share her personal info, so it's blurred out)

I made this flower using an IN LOVE princess petal that I surrounded with some of the ruffled lace.
The stem is made using the soft velvet ribbon from this collection.
I added the pearl flourish and flower center from my stash. 


(This is a close up of the ribbon layered on this picture. I used the ruffled lace, added the velvet on top  and then some pearls to complete it. )

Hope you found something to inspire you.
Have a blessed day.

Chris


Thursday, June 21, 2012

Started the album for my sis

Okay, I'm starting to get back into the swing of things. : )   I've started the album for my sister's 50th birthday present. Woohoo! Now I need to really buckle down and keep working on it.  

So for this layout I used  Webster's Pages products. Mostly from the IN LOVE COLLECTION.


I just love these pictures of her. What a cutie!

I trimmed the butterflies from one of the 12x12 pages I had. The Chevron paper was from a 6x6 piece. 
I cut two different pattern papers in a scallop circle shape using my Marvy Punches one at 2 1/2 inches and one at 3 inches. I added the "adore" fabric ticket to the top of it and put it all on the page with foam squares. The ribbon I used from the In Love collection is so awesome to touch because it's like velvet. SOOOOO  soft!  I just love it!  
The journaling card is from this collection also. 
The sticker letters I used to spell out her name are from the collection too. The only thing I didn't like is that all the letters are lowercase.  So I improvised and added an a "p" to the top of the lower case "r" to make it look like a capital "R." 

A few pearl dots from my stash and I'm done.

Thanks for taking a look.  Hope you're having a wonderfully creative week!

: ) Chris

Sunday, June 17, 2012

Treat Tins

I know it's been forever since I posted. So sorry for being out of the loop for so long.  I think I got burned out from working on my parent's 50th anniversary stuff.  I'm thrilled with how all their stuff turned out but I'm kicking myself because I didn't take pictures of everything!  *GASP* I know! What was I thinking??? That's the problem, I wasn't. LOL.   So my Mom has promised me to bring the 3 albums that I made for them with her to my house next week and I'll be able to take pictures and share with you what I spent all my crafty time on. : )  I did remember to take pictures of the treat tins we had sitting at every place setting.  My sister-in-law and I worked on these together.   I got the idea from the DCWV blog.

Here's some pics:


All the flowers on the top are magnets.  We added different centers to each of the paper flowers and inked all the edges then added magnets.   We cut out the shaped tops from Elegant Edges, inked them and stamped them with a few different sayings. Then we modge-podged them to the tin. (Ok, my sister-in-law did and she still loves me even after all that!)


Here's the insides:


We had mints in the bottom. The inside top of the tin was also 3 magnets that we made.
The round ones are wood circles that we glued different papers to the top of and stamped different images on. We inked the edges of the wood circles and it looked so cool! Sorry I didn't get a good picture of it.  The other shaped magnets were shapes I cut out using the Cricut. We inked, doodled on and added magnets to finish those off.   We made a total of 72 tins.  So that was a LOT of magnets. 

(This is my 3 year old helping me fill the tins)


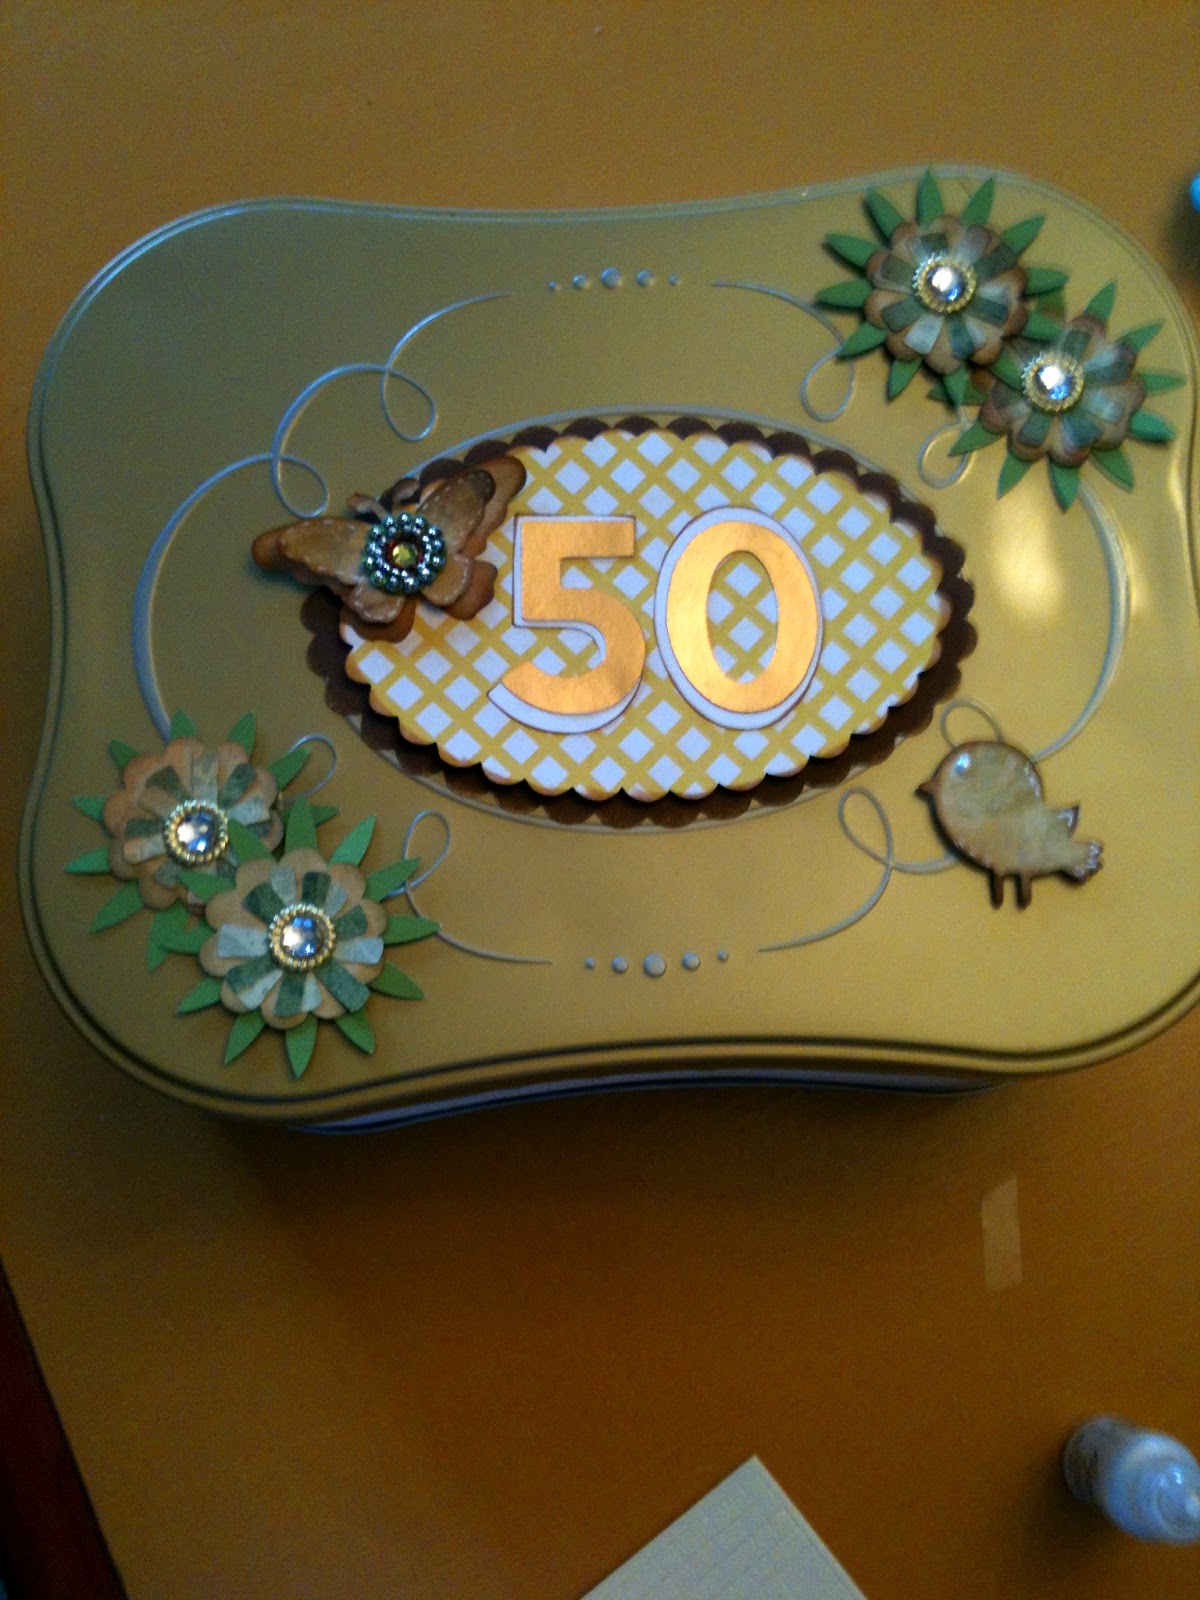
This is the tin I made to hold the cards they received at the party.
Sorry for the bad picture. This was with my cell phone to show my sister what it was looking like.
It's not the finished product but it's really close.   This was an old cookie tin that I decorated with cuts from my Cricut Cartridges. Sorry I can't remember which cartridges I used.  The only one I know for sure is Elegant Edges for the scalloped ovals. 


I'll post more pictures of my parent's scrapbook albums once I get them.
In the mean time, my next big project is for my sister. She's turning 50 in August and I'm making her an album.  I'll try and be better about taking pictures to share. : )


Thanks for sticking with me.  I hope to be back to a regular schedule again.

Big hugs!
Chris


Monday, April 30, 2012

Personalized baby gift

Today I'd like to share with you a shadow frame & a card that I made for a friend of mine who just had a baby.  As you can see from the picture below, the baby came a little early and is a tiny peanut at 3lb 14 oz but she's doing well in the NICU and we are thankful. 


(I had to "blur" out her last name since I don't have permission from her Mama to post that in blogland)


Here's some details:

The card I made using the New Arrival Cricut cartridge. 
The congratulations stamp is from Fiskars.
The papers I used are all The Paper Studio.

The frame is a shadow frame I bought from Michael's. 
For the inside, I used the Cricut Craft Room and laid out the design.
I used the Jasmine Cartridge, Art Nouveau, Beyond Birthdays, Disney Pooh Font Set & New Arrival.

Instead of cutting out all the cuts, I used the Cricut Ink and had it "draw" them on the white cardstock.
Then I colored them in with colored pencils.
I added some flowers and gems and Stickles for the extra touches. 

On the outside of the frame I added some ribbon. To adhere it I used Terrifically Tacky Tape and it stuck on there really well. : )   A few paper flowers and some gems on the outside to finish it off. 

I'm also going to make her some "devotional diapers" that I saw on The Better Mom website and then get this package in the mail. 

Thanks for spending a few minutes with me. 
Hope you'll come back again soon.
: )  

Thursday, April 26, 2012

Fairy Dust Birthday

I'd like to share with you a birthday card I made using some digi-stamps from Bugaboo Stamps.
I wanted to participate in their Stella Says Sketch Challenge 109.
I'm getting used to these digi's and am really starting to have some fun with them. 
If you haven't tried them, I highly recommend it. 


Here's the sketch:


So here's my card:


I used the digi image of Girl Fairy Birthday Dust from Bugaboo.
It comes with the sentiment. "Birthdays are regular days sprinkled with fairy dust"
I colored her using colored pencils.  
I added Stickles to her petal skirt. And on the circle of the sentiment.
You can't see it in these pictures but I added Glossy Accents to her wings.
I really like the effect of the Glossy Accents.
The glitter paper for the mat is from DCWV.
The calendar paper is from Foof-a-la's Hall Pass collection.
I trimmed the paper with the Fiskars grass punch and added some ink and stickles.
The pink ribbon is from my stash.
I added some gems and doodled around the edges.
That about covers it. 
Hope you found something to take away from this card.
Pop on over to Catch the Bug Challenge Blog if you'd like to participate in any of their challenges.

Thanks for stopping by.